Built-in Android Mail App
These instructions might vary slightly across devices and versions, but are expected to be helpful to all users of the Android OS.
- Navigate to Settings.
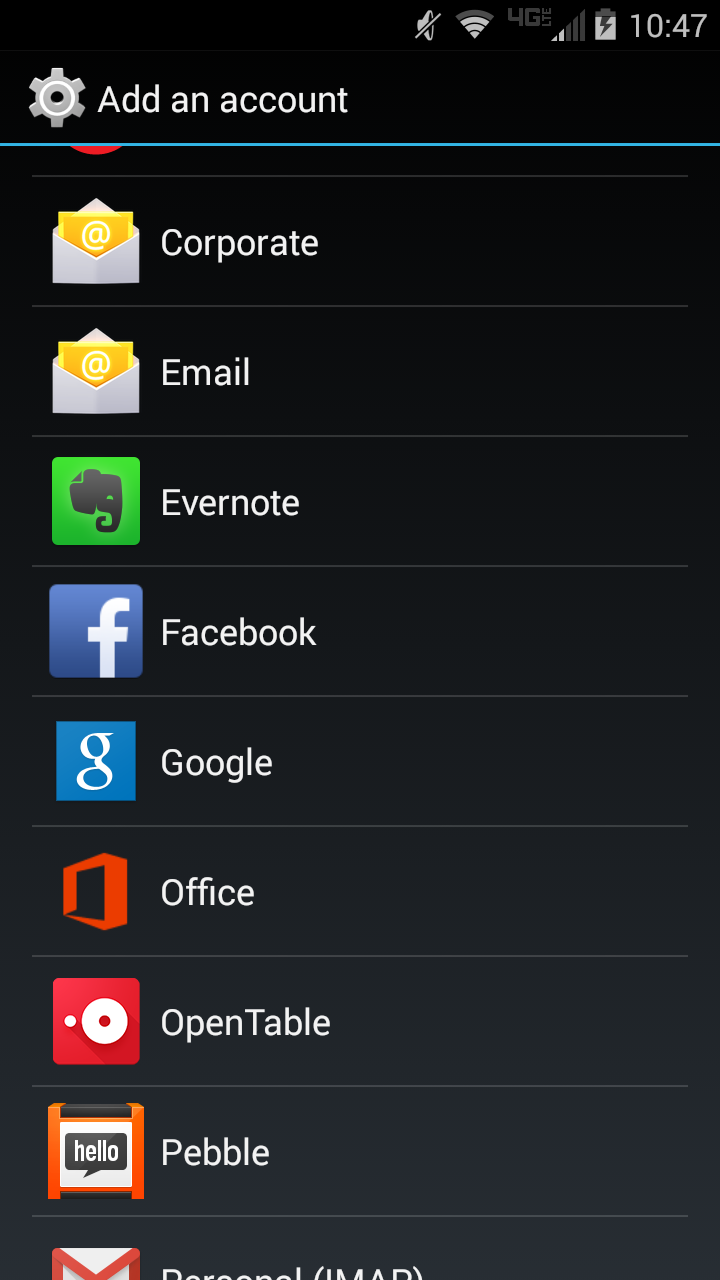
- Under Accounts, select Add Account.
- Depending on your version of Android, select either Corporate or Microsoft Exchange ActiveSync.

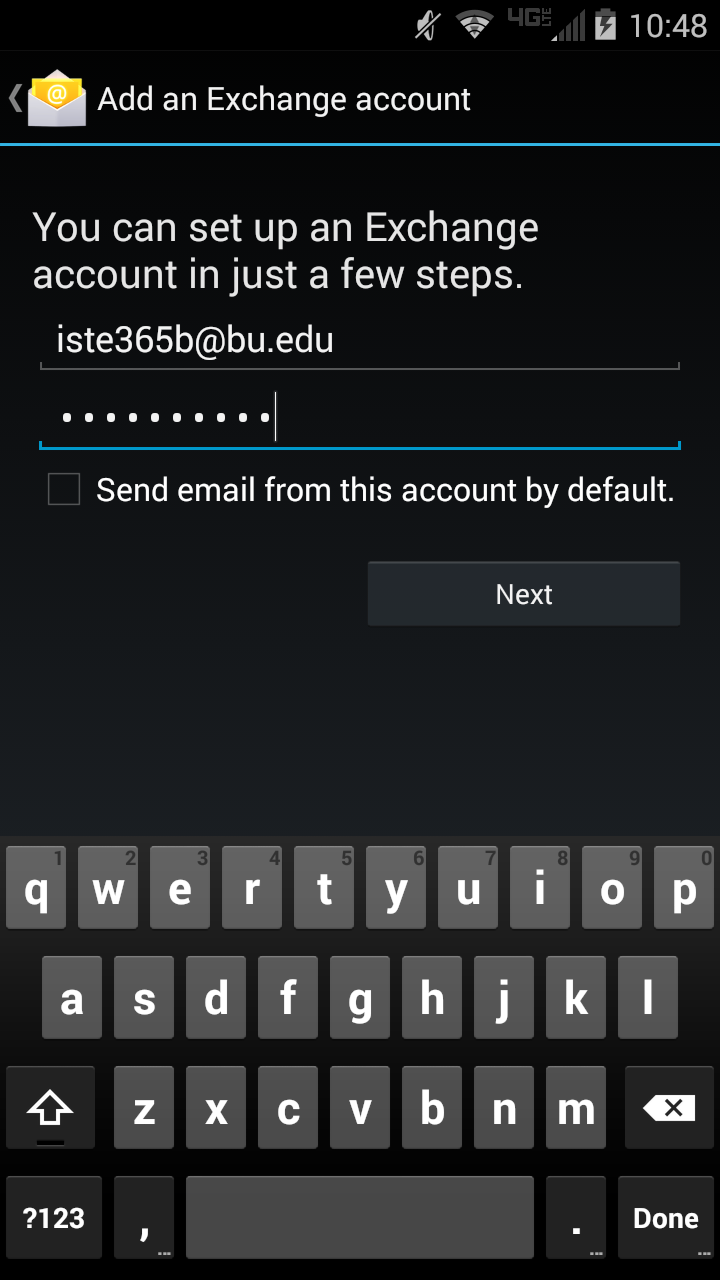
- Enter your complete e-mail address, which is login@bu.edu (where login is your BU login name.)
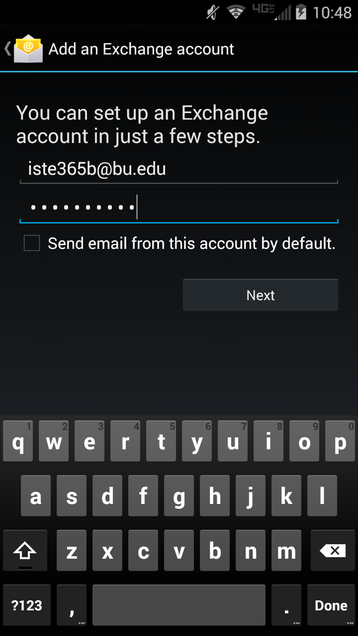
- Enter your Kerberos password.
- Click Next.
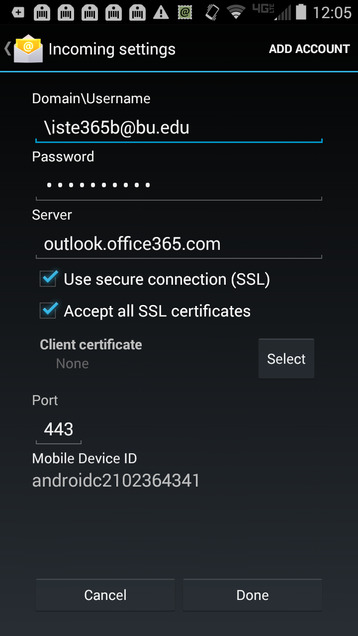
- If prompted enter outlook.office365.com for the server address.
- If prompted check Use Secure Connection and Accept All SSL Certificates.
- Set your Account options such as Days To Sync, Notifications, Sync Contacts, Sync Calendar.
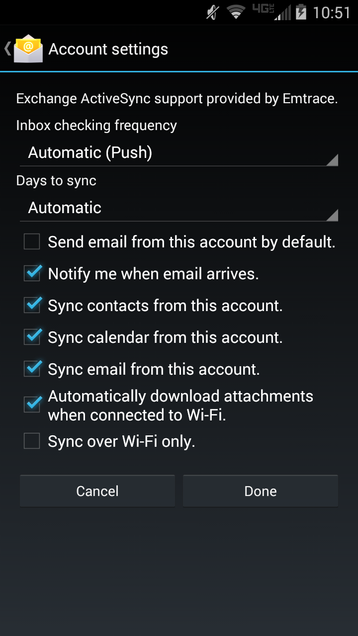
- Click Done.
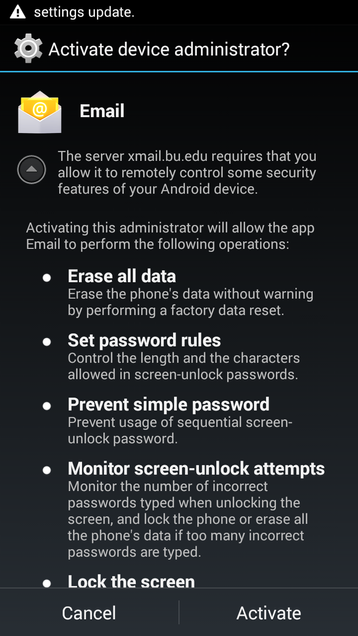
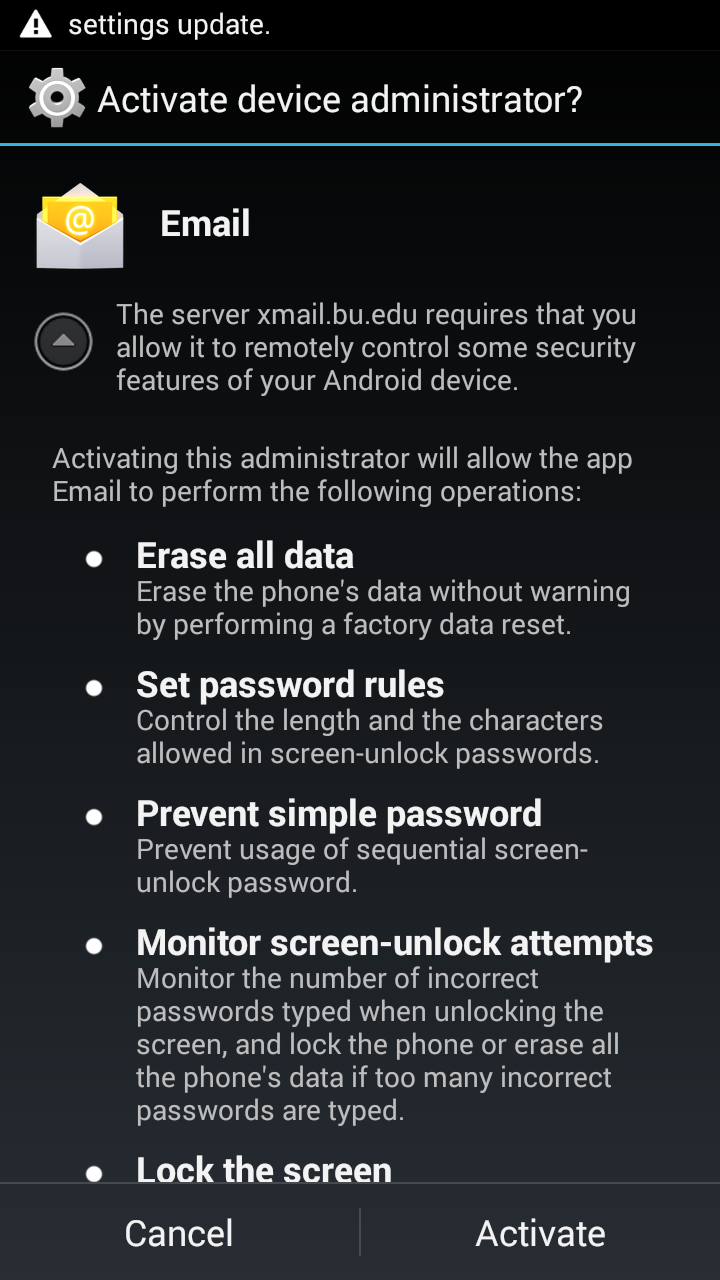
- Click Activate to activate device administrator.
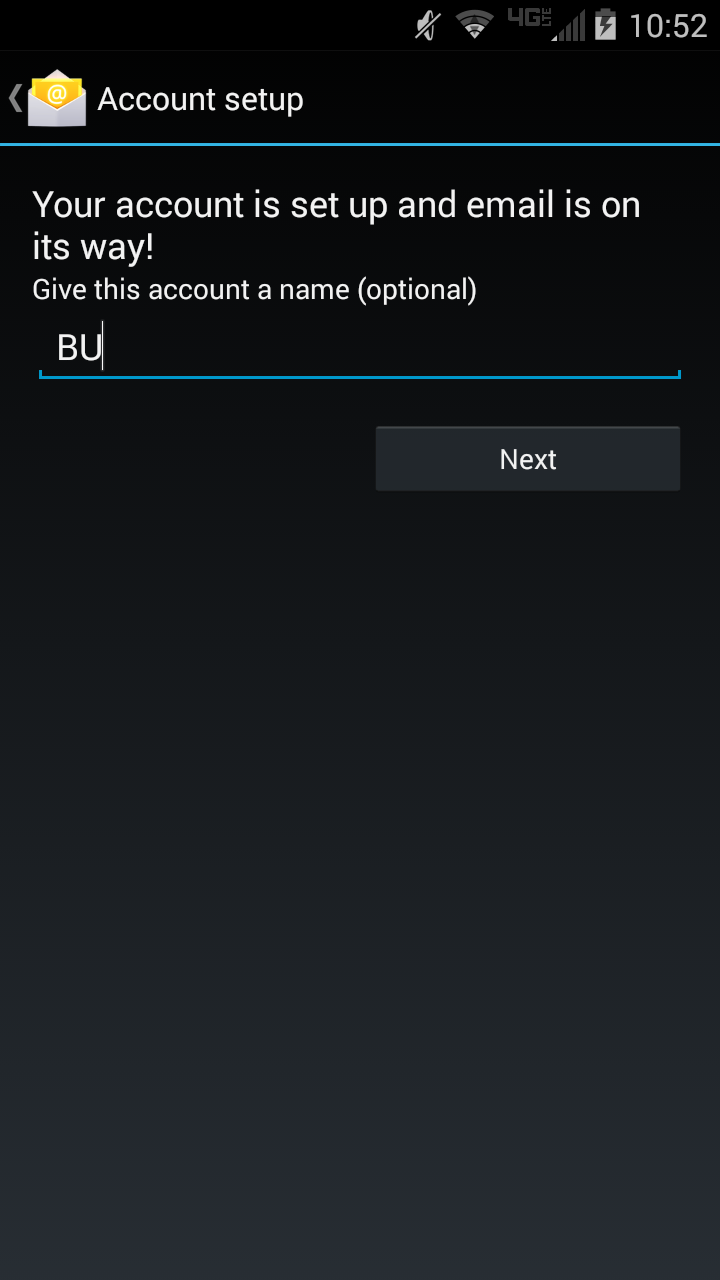
- Name the account to distinguish between multiple accounts.
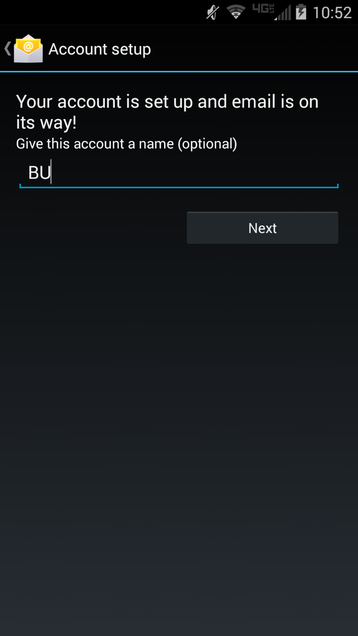
- Click Next.


Related Content
| Filter by label (Content by label) | ||||||||||||||||||||
|---|---|---|---|---|---|---|---|---|---|---|---|---|---|---|---|---|---|---|---|---|
|